E-Safar – online system for Tours and Inspections
E-Safar is online software for monitoring of Tours and Inspections. The various modules available are briefly described below. The s/w provides access to an authenticated user who may be:
- Administrator
- HOD (e.g. DC, Circle Officer etc)
- Normal user
For every district, the admin user id and password has been provided.
The s/w provides the following menu options on successful log in:
For Admin User
Main Menu Options
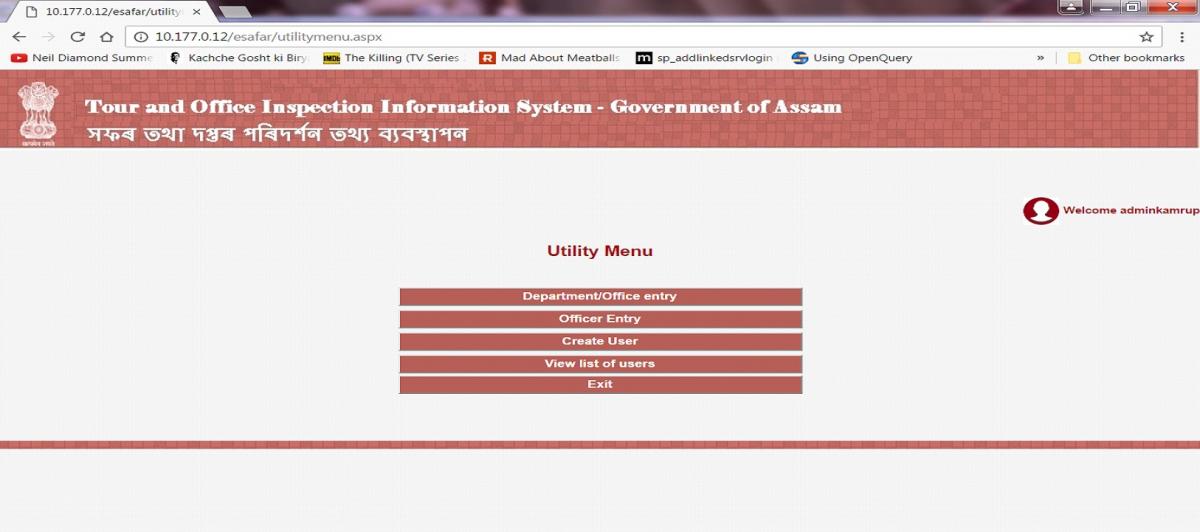
The ‘Utilities’ option enables the user to do the following :
These options are explained below with an example – Suppose an officer has been deputed from the DC’s office to inspect one of the circle offices. The workflow starting from tour details entry has been explained below. Steps to be followed by the office that was inspected (in this case the circle office) in order to upload the action taken report are also explained.
For District Admin user
- Log in with the user and password provided
- Select the ‘Utilities’ option.
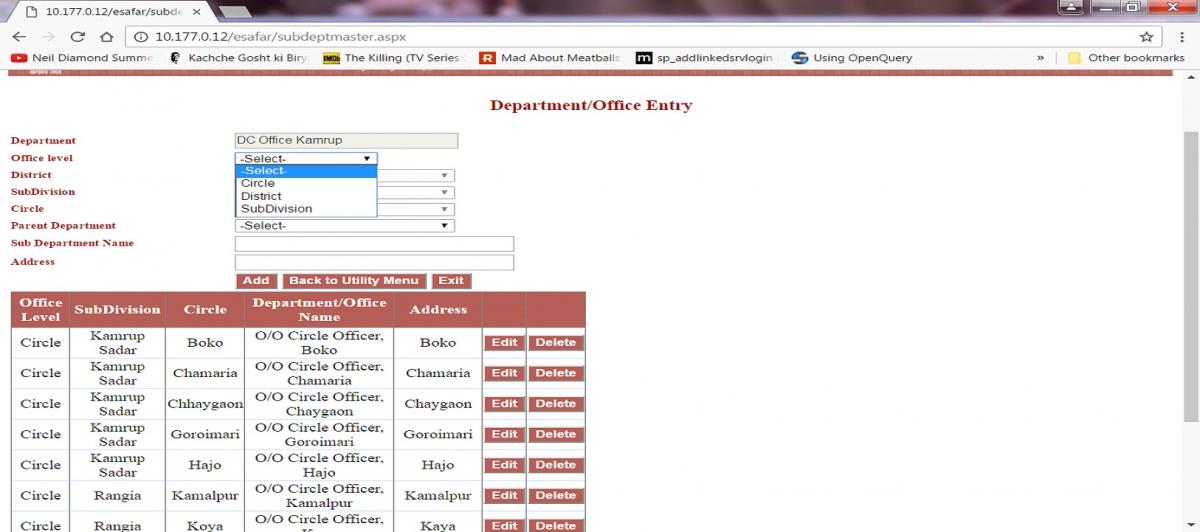
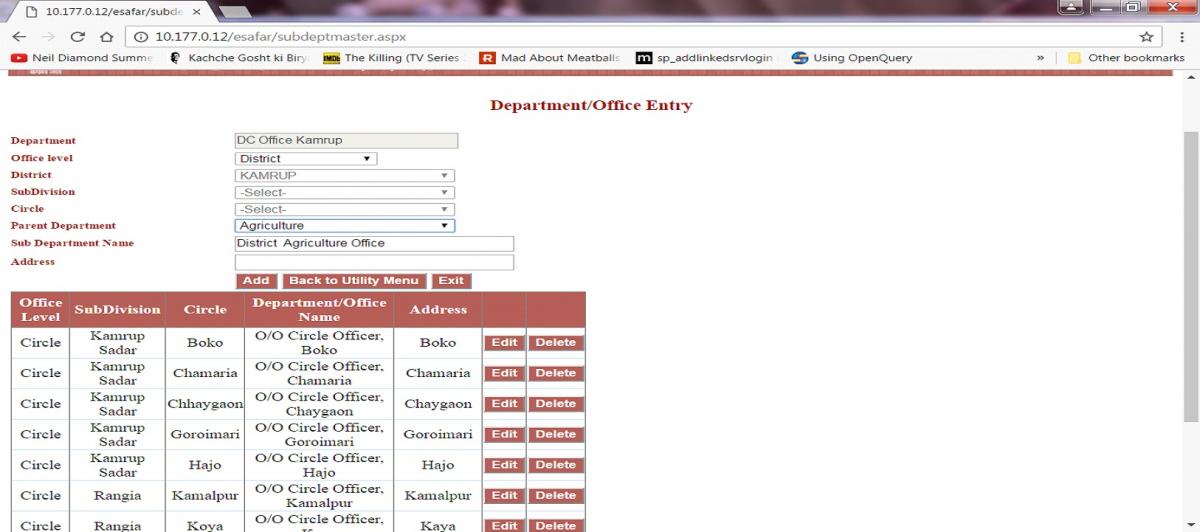
- First enter offices for your district after selecting the appropriate office level from the drop-down list (Circle/District/Sub-Division)
- The DC office is already entered.
- If the office is, for example ‘District Agriculture Office’ then the parent department has to be selected as ‘Agriculture’ from the ‘Parent Department’ drop-down list. Otherwise, parent department is taken as DC’s office by default.
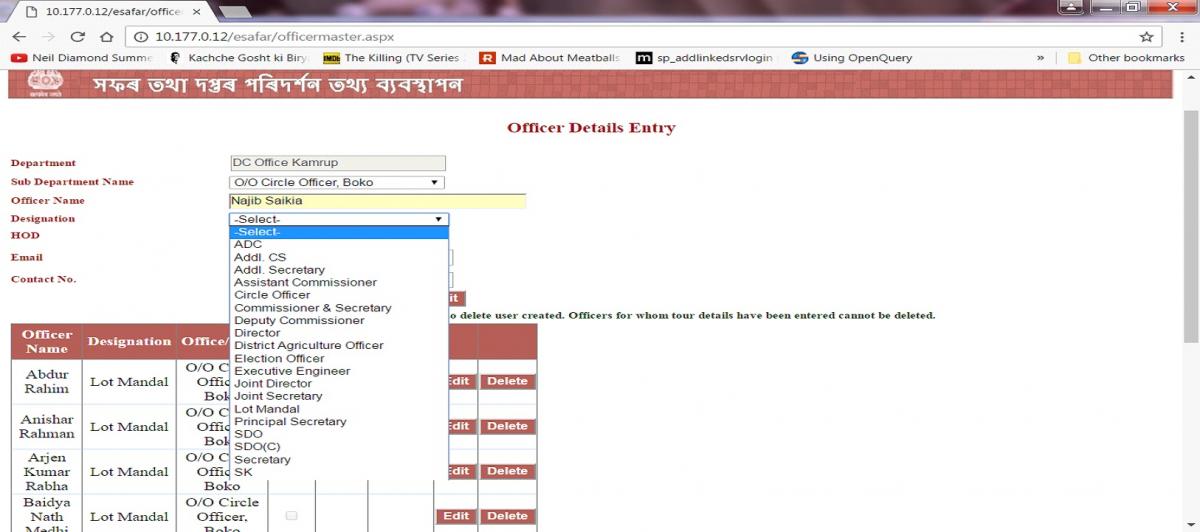
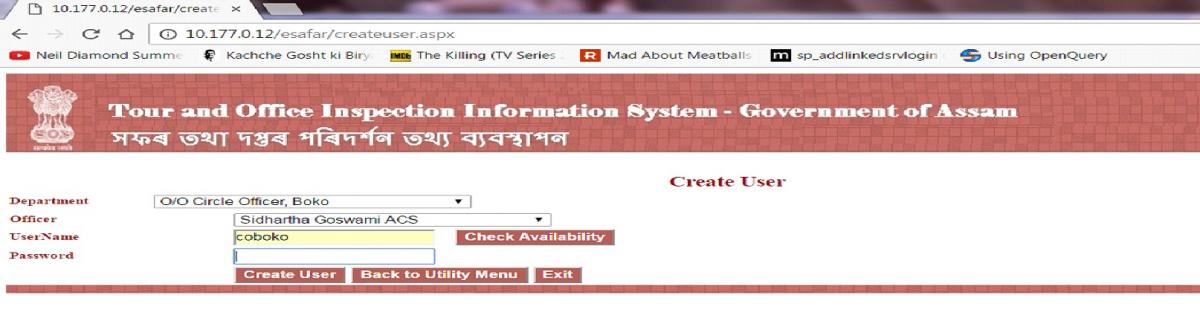
- Next, for each office, enter officer details by selecting the appropriate Office, designation from the dropdown and filling in the other textboxes for name, email and contact number.
- The HOD is to be marked for each office by checking the ‘HOD’ checkbox. (For eg. For the DC office the Deputy Commissioner is the HOD).
- After entering officer details, you can create users for each officer by selecting the appropriate office and officer name from the form.User name and password have to be entered and if user id is available for use the user will be successfully created.
For HOD user
A user logging in as HOD has the following options:
- Change Password
- Tour/Inspection
- Reports
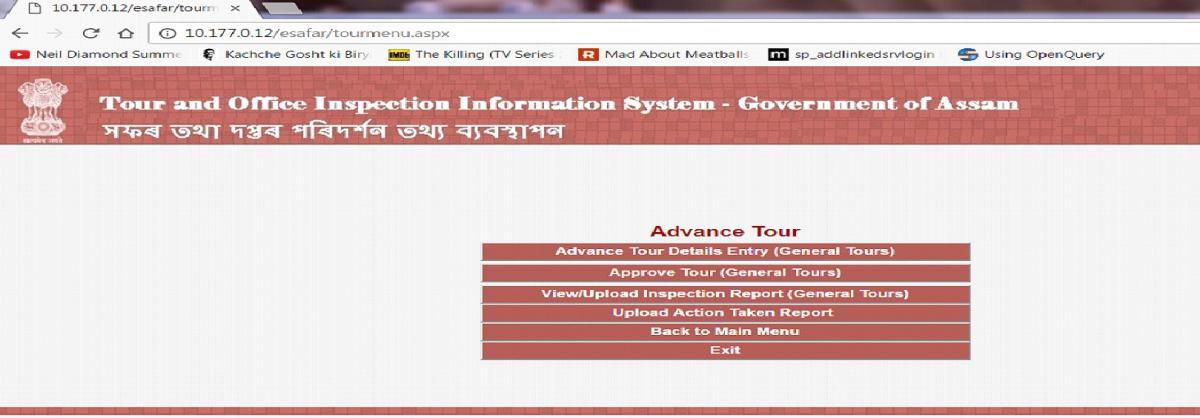
The Tour/Inspection option has a sub-menu with the following options:
Note: For circle officer user, the ‘Tour/Inspection’ menu has additional option for entering tour details for Lot Mandals.
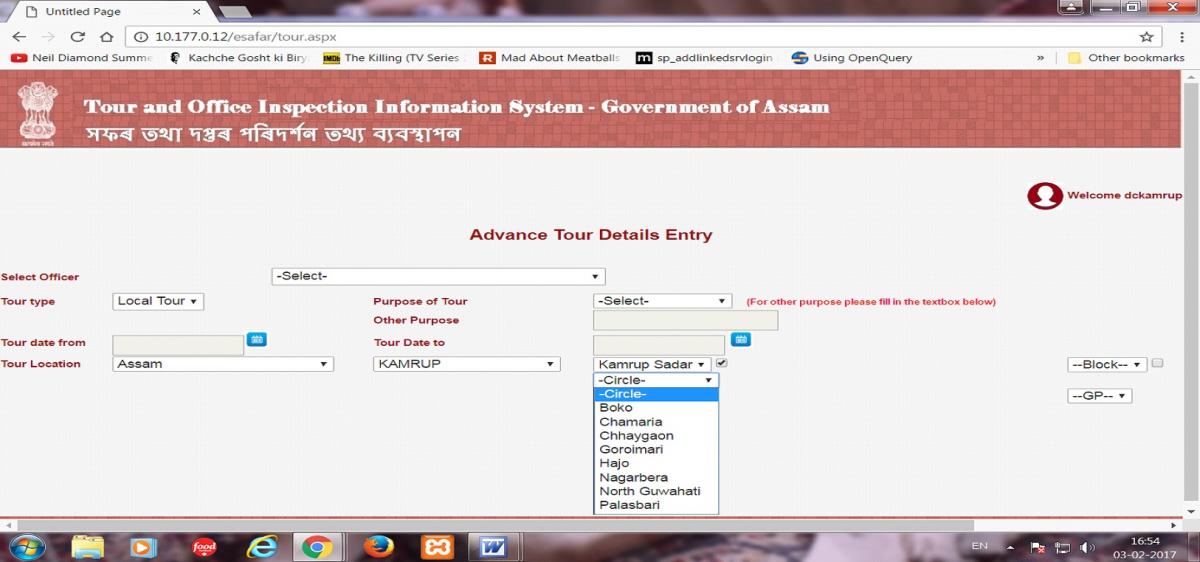
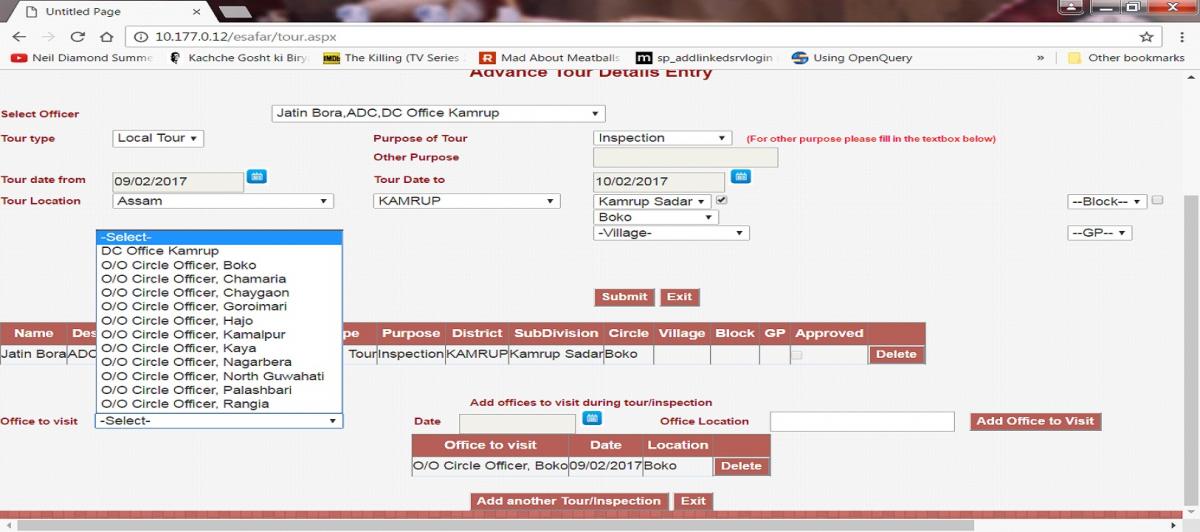
The ‘Advance Tour Details Entry’ option is used to enter tour/inspection details.
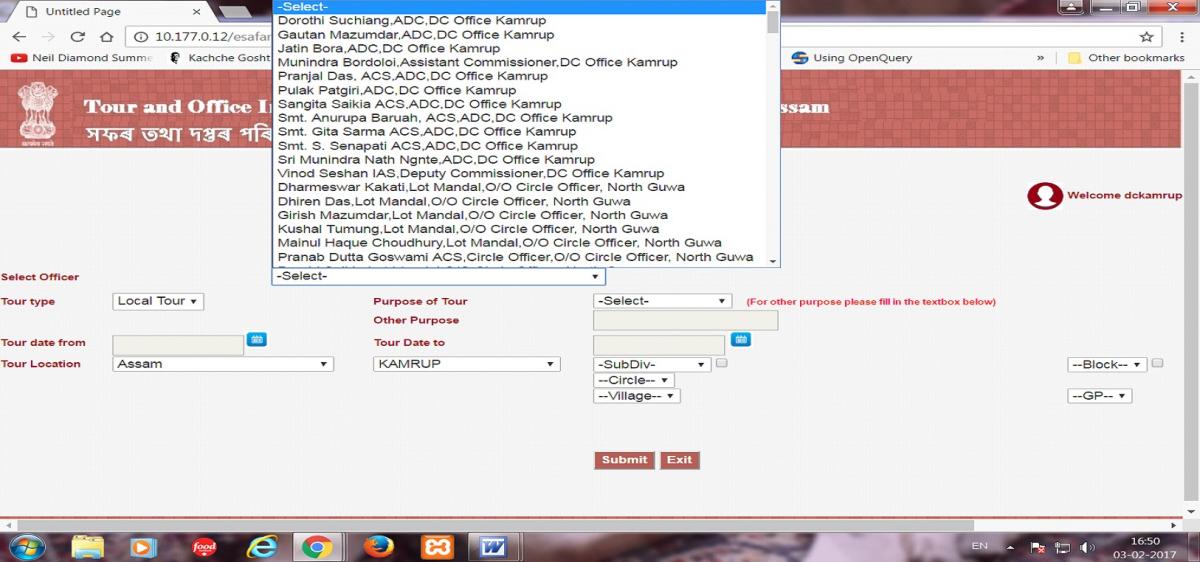
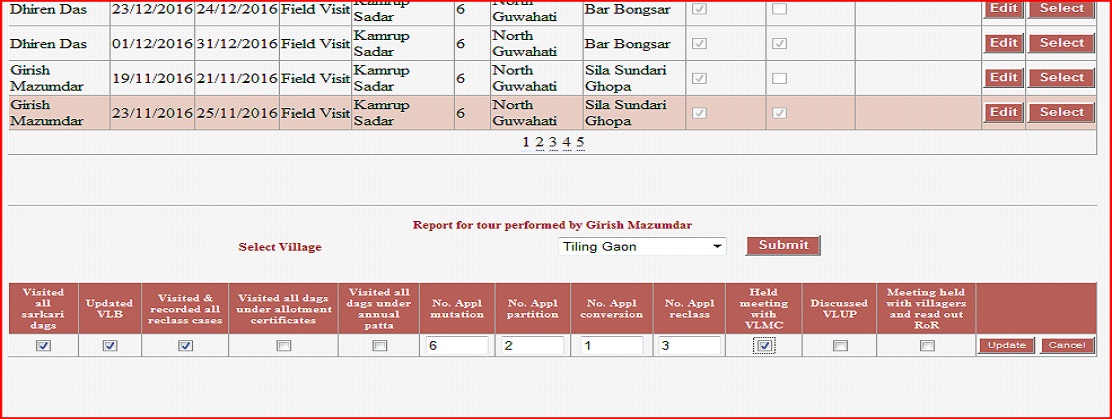
The drop-down list gives a list of all officers/officials of the office from which the officer proceeding for tour/inspection can be selected. Other details such as tour type, purpose of tour, tour dates, and location can be selected and entered. To select a subdivision/circle/village, the checkbox next to the subdivision drop-down list has to be checked to enable it.
After entering these details, the form can be submitted.

The user now has to select the office(s) to be visited during the tour/inspection from the form appearing below. Multiple offices to be visited can be added.
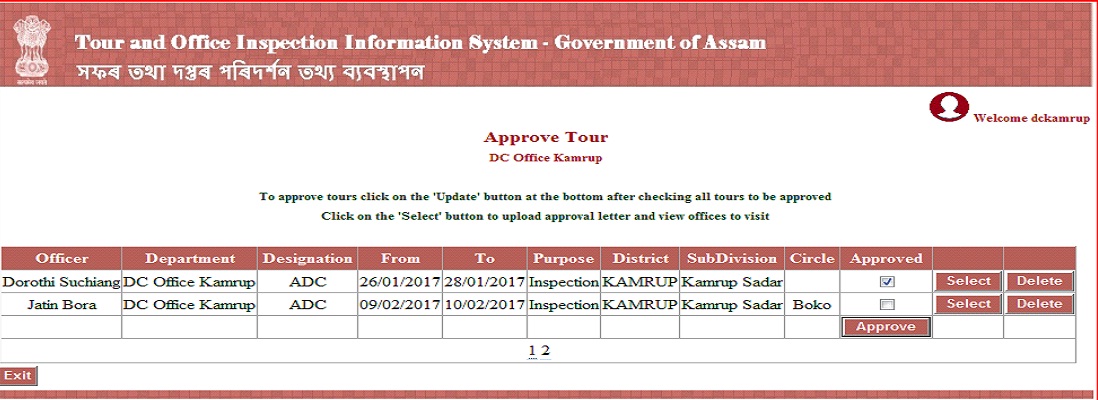
After tour details are entered, the tour has to be approved by the HOD. For this the ‘Approve Tour’ option has to be selected. A list of all tour details entered into the system for the office will be displayed and the approved checkbox has to be checked to approve.
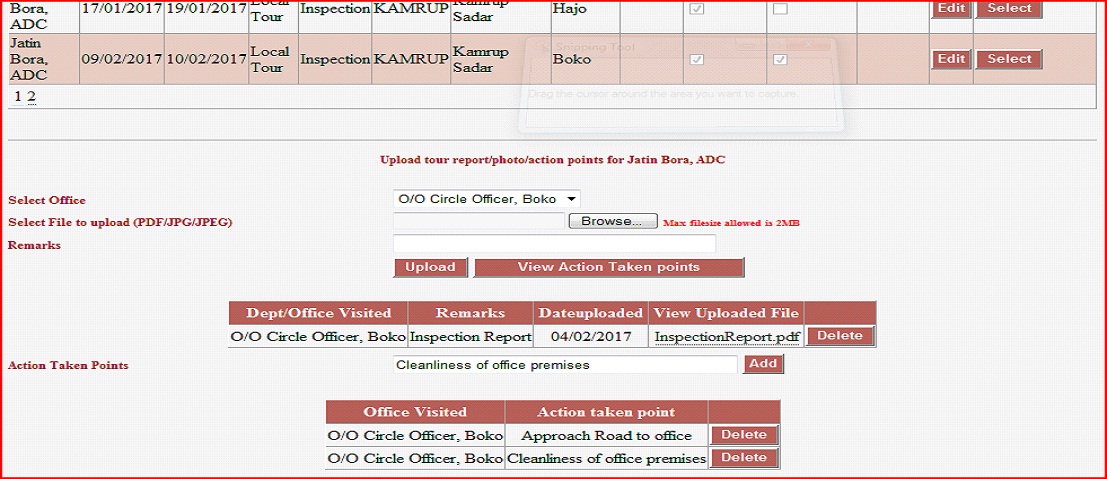
After the tour has been approved and performed, the Inspection Report can be uploaded. The tour performed checkbox has to be checked before Inspection report can be uploaded.
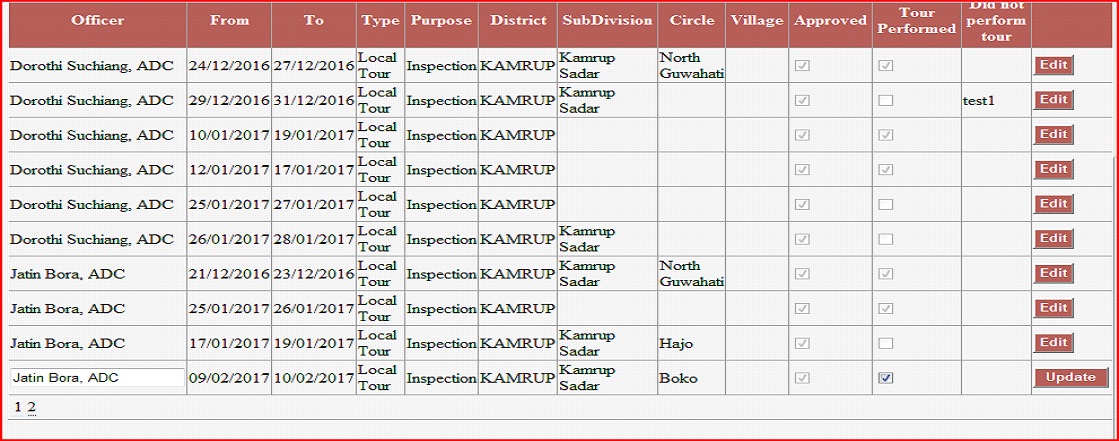
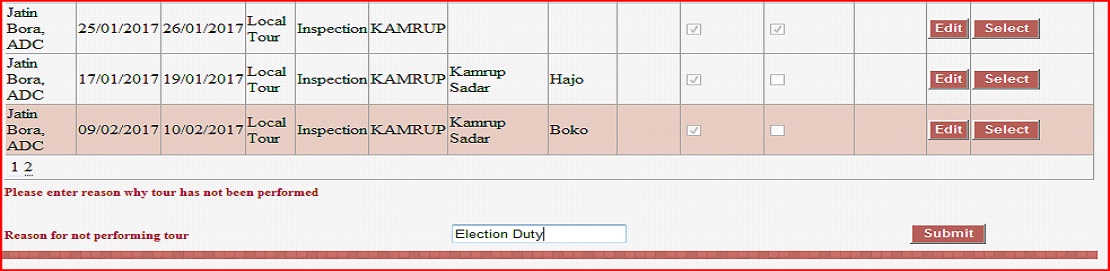
Clicking on the ‘Select’ button for the particular tour will allow the user to either upload Inspection report and action points OR will prompt the user to enter reason for not undertaking tour (in case the ‘tour performed’ checkbox has not been checked).
In case, tour has not been performed, the user has to enter the reason for not undertaking the tour.
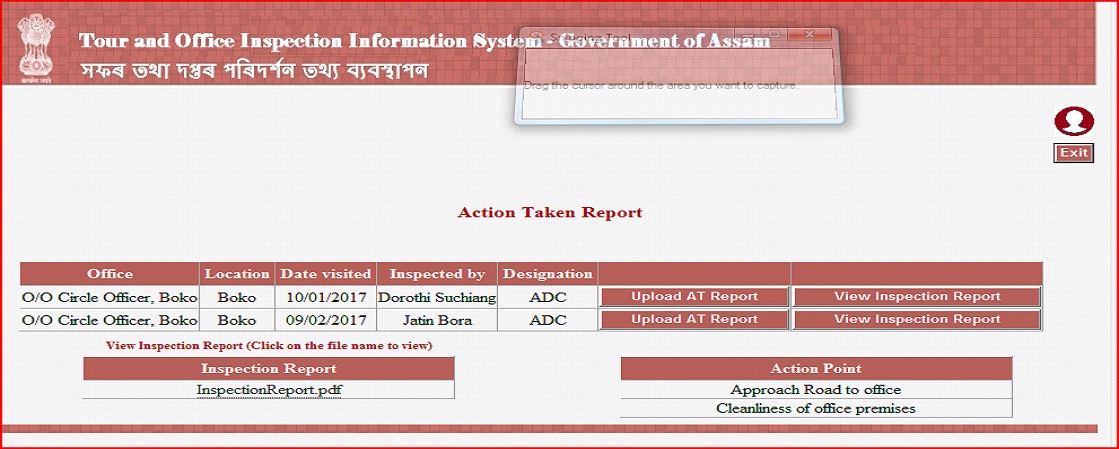
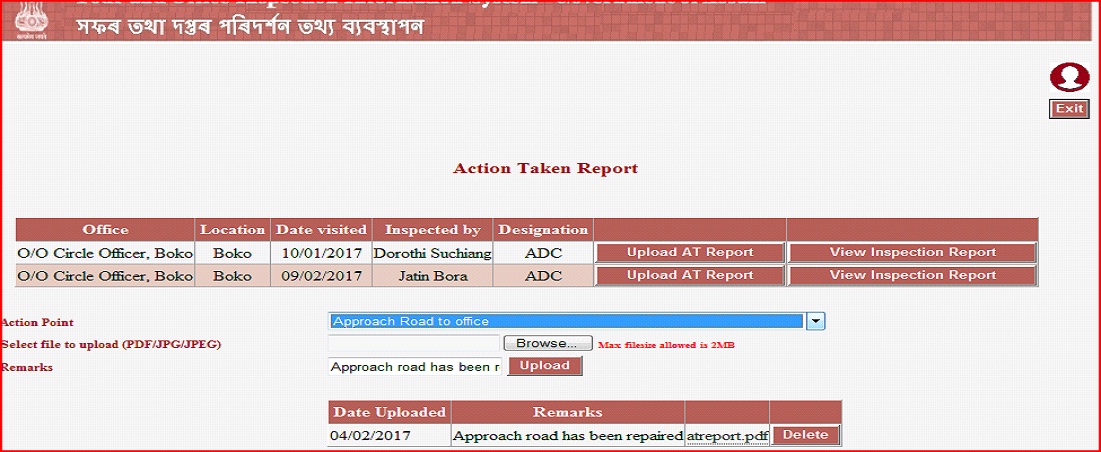
The office which has been inspected can now view the Inspection Report submitted by the inspecting officer (after logging in) and can upload Action taken report against each action point.
Note: For uploading Inspection report for LMs the procedure is exactly the same, only the form is different
The Reports option enables the user to generate reports such as:
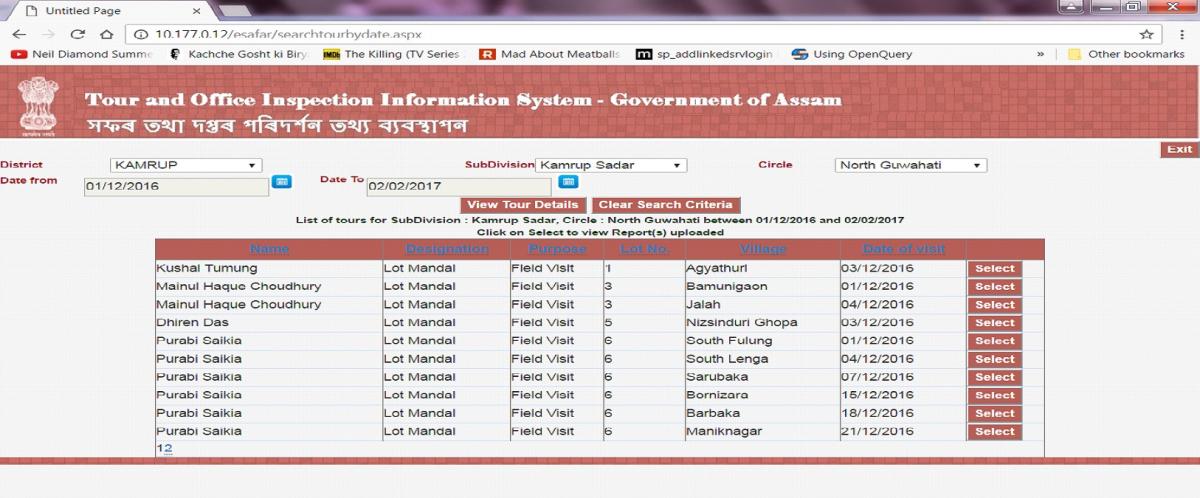
- Search Tours and view Inspection Report.
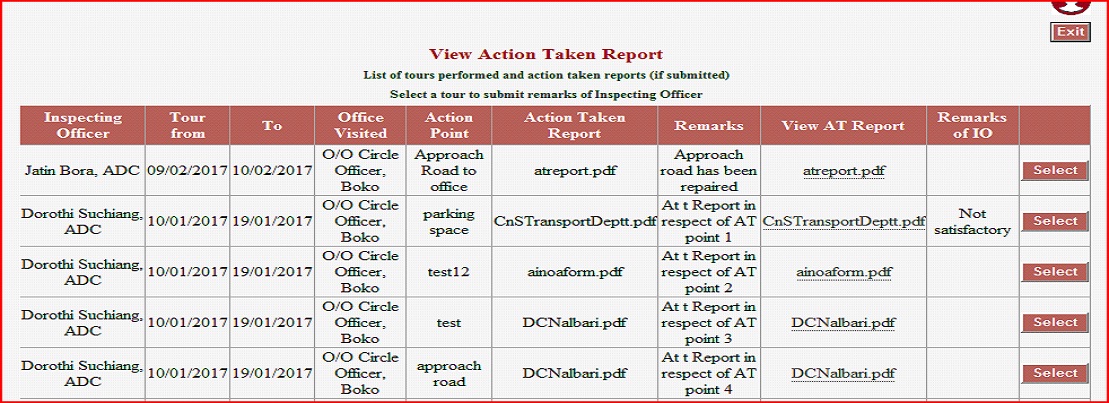
- View Action Taken Report and add comments of Inspecting Officer (this option is to view an Action taken report submitted by an office that has been inspected by the officer).
- View Action taken report and comments of the Inspecting Officer (this option is to view Action taken report that has been uploaded by this office).
- Tours planned but not performed.
- Tours performed.
- No action taken report (this report gives a list of offices that were inspected by an officer from this office and action taken report has not yet been submitted by the office inspected)
Non-HOD user
- The officer can log in and enter his/her tour details.
- A general user can also upload inspection report for a tour performed after it has been approved by the HOD.
- Users can inspection report after tour has been approved.
Note: Tour program entered by a general user can be viewed by that user’s HOD for approval. For example, if one of the officers from the DC’s office enters a tour, then this tour has to be approved from the DC login.
Regarding file types and sizes for uploading
- PDF, JPG and JPEG files can be uploaded in case of Inspection Report.
- Only PDF files can be uploaded for Action Taken Report.
- File names should not have spaces or numbers.